Blogs

How to Do Your Own DIY Food Photo Shoot

  
A pair of hands shaves a hardboiled egg onto avocado toast.


So, you want to take quality food photos, but you don’t have professional gear. Never fear! Creating great food photos doesn’t have to happen in a studio. We say that with absolute certainty because ours happen in a kitchen.

Let’s get down to it.

There are some bare necessities you need in order to make food shots pop. Obviously, you need a camera. Luckily, you don’t need a high-quality DSLR or mirrorless camera to make that happen – smartphones can get the job done just fine! For the record, we shoot on a DSLR, but you don’t need to!

Then, you need a backdrop. A good food photo might look like it’s sitting right on the kitchen table – and sometimes that’s true – but there’s actually a great deal of thought that goes into it. We’re big fans of a large vinyl print for ours.

Third, of course, is the star of the show, the food! Pick your dish, make it well, and let it shine! There are actually a lot of “tricks of the trade” that go into the food shots you see in marketing portfolios and commercials that are frankly mind-blowing the first time you hear them (or maybe that’s just the case for this author).

Lastly, it all comes together. The execution. The shot. The result!

So let’s get down to it. 

The Backdrop

 Let’s start with making it clear that you don’t need this to be fancy. In truth, just about anything can make a good backdrop, provided it works with the colors of the dish and the available light.

In our case, we’re fond of a few vinyl prints that look like marble. Check out the INFRA Recipe Box and you’ll see what we mean!

Bread on a cutting board sits on an unrolled vinyl photo backdrop while someone tapes it flat to a table.Our Fresh Retail Consultant who takes most of our food shots, Michael Paynic, is here setting the backdrop with tape

Luckily, you don’t even need that. The important thing is that the backdrop does not clash or draw the eye from the subject. Keep it neutral. If it’s too colorful or splashy, it gets distracting and detracts from the food itself. 

Contrast between the food and the background is key when choosing a backdrop. Generally, go for lighter-colored backdrops like white or tan (or a fun color that complements the food), or for darker-colored backdrops like black or navy blue. Just remember to pair darker backdrops with lighter-colored foods and lighter backdrops with darker-colored foods.

A cooked turkey sitting on a plate with greens, oranges, and berries. The plate is on a slatted wooden table.The wooden backdrop gives a homier vibe, perfect for a Thanksgiving meal

With that rule of thumb in mind, don’t be afraid to get creative! Tablecloths, cutting boards, tiles – you name it – they all work! Just be mindful of the balance and make sure it doesn’t detract from the star of the show.


The Subject

The recipe is up to you! Shooting a promo shot for your store’s hot bar? Maybe a nice aesthetic shot for your Instagram? How about images for your catering menu? 

To sum it up: Neat and Appetizing.

Food photos may look effortless, like they’ve simply been laid out on the table before you, but there’s actually quite a bit of arrangement that goes into that appearance.

If the dish is messy, then it just won’t make a very good photo. Arrange them in pleasing ways by creating patterns or symmetry. In all photography, composition is king.

A flatbread with spinach and cherries that is sliced into triangles.This flatbread is cut in a pattern that draws and invites the eye

Clean up the plate, arrange garnishes intentionally, and set the scene!


The Arrangement

You’ve got your backdrop and your star. Now it’s time to set the scene.

There’s a lot of room for creativity here. Just remember to select your backdrop to make your subject pop and to arrange the dish neatly.

Now then, the arrangement.

First off, give your dish some room to breathe. Let the backdrop do its job and fill some of the space. This also gives you room to add some props to spruce up the shoot or leave blank space to fill with copy later. With enough open space, your photo won’t look cluttered and stressful.

Street corn salad in a bowl with limes, a small bowl of chili flakes, and a dishcloth nearby.Small props like this dishcloth and bowl of chili flakes add contrast without being distracting

Try adding a few touches to the space around the dish. If you’ve got some bread on a cutting board, a bread knife and a few intentionally placed sprinkles of crumbs will make it look more natural.

If it’s a cup of coffee, a nearby book or laptop peeking into the shot will give it a cozy, at-home or at-work vibe.

Say you’re promoting a brand in your store. Placing the ingredient packaging in the backdrop will do the job!
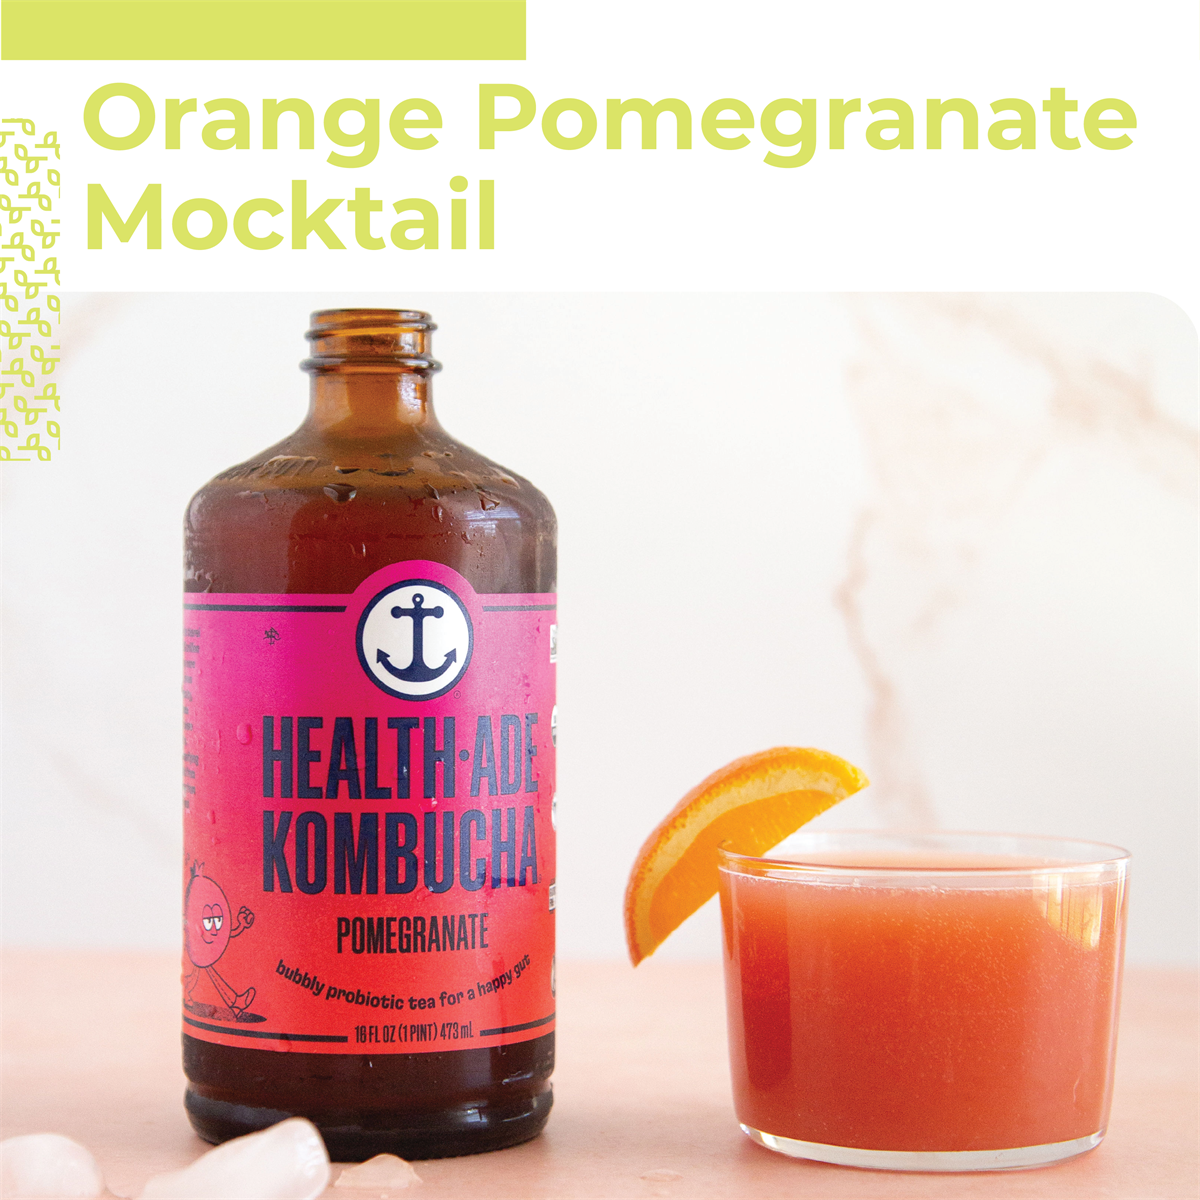
A glass of orange pomegranate mocktail, with an orange slice on the rim, next to a bottle of Health-Ade Pomegranate Kombucha.Pairing the made recipe with the featured product can be a great promotion

However you decide to arrange, start small and take lots of variations. Add in a sprinkle of crumbs and snap a shot. Then add the bread knife or a handful of coffee beans by the mug. A simple shot of the dish alone works great, but some well-placed extras can really draw the viewer in.


The Execution

Alright, alright, alright! Your dish is lookin’ mighty purdy, the backdrop complements it just right, and you’ve chosen a few tasteful decorations to flavor the shot. 

It’s time.

The first thing to remember is that natural light is your friend. If you’re doing this in your store or at home, try setting up by a window that gets good light. We like to push a table right up to the windowsill and open the blinds.

However you use the light, whether you’ve got a diffuser one might find in a studio, or a window and a flashlight, be mindful of shadows. Since we use a DSLR, we use a tripod to get the camera right above the dish.

Furthermore, pay attention to how bright the photo is. If you’re using white dishes, it can be easy to overexpose (to let in too much light) and get a washed-out look. Experiment by taking photos at different exposure (or brightness) levels to find the one that will give the best details.

On a smartphone, this can be done by tapping different parts of the subject in the camera app and sliding your finger up and down, which adjusts the exposure.

When you’re above the dish, it can be difficult to avoid casting a shadow over it. An inexpensive light reflector can help negate some of the shadows, but you can also simply shoot opposite from the light.

Two people position a light reflector near a camera tripod to make the photo brighter.Using the light reflector opposite the light source makes everything even

When taking the shot, explore different angles! We like to do top-down shots, but that doesn’t mean you have to! Top-down is a good go-to and a mainstay angle in food photography, but taking shots from multiple angles gives you plenty of options to choose from.

After all, you’ve already set up the scene, so why not?

Take lots of variations. Take more photos than you think you need. You want to give yourself options when editing and picking “the one.”


The Editing

So, you’ve got your photos. Now all that’s left to do is edit! Smartphones all come with their own photo editors and generally use quite similar slider tools to adjust photos. The ones you’ll probably find to be the most useful are:

  • Saturation, which increases or decreases the intensity of all colors in the photo. It’s very easy to overcook the photo with this tool, so it takes a little experimenting.
  • Brightness/Exposure, which increases the amount of light in the photo. This can be a very handy tool for both increasing and decreasing the light to gain the most detail.
  • Contrast, which darkens the dark parts and lightens the light parts to create more contrast in the photo. This can make an already high-contrast photo really pop.
  • Sharpening, which simply gives soft edges more clarity and focus. It’s easy to oversharpen and make photos grainy, so this is another tool to experiment with.

Don’t be afraid to up the colors and edit a bit. Food photography is vibrant. The saturation tool is your friend. Be mindful not to go too high or the photo will look fake. But bumping it up a few points at a time will help make the colors stand out and pop right out of the image.

An image of a cooked turkey with the color saturation turned too highAn oversaturated turkey A photo of a turkey with the saturation at an appropriate level.An appropriately saturated turkey
 

When adjusting the exposure, or brightness, pay attention to the brightest parts of the photo. These could be the white dish, or light-colored ingredients. These are your indicators that a photo is too bright, because if you turn up the exposure and make the backdrop look better but wash out the subject, it’s gone too far.

A photo of a turkey that is not exposed enough and is not as bright as it should be.An underexposed turkey A photo of a turkey with appropriate exposure levels.A correctly exposed turkey

If you’re posting to Instagram, sometimes simply using the built-in filters does the trick and takes the guesswork out of editing. Still, don’t be afraid to experiment! Photograph editing rewards the ones who are willing to try a bunch of things.

Now get out there and take some photos! If you use any of the tips from this article in your next photo shoot, tag us in your photo – we’d love to see it!

New to INFRA? Longtime supporter? Industry professional? Stay In Touch and In The Know by subscribing to our quarterly newsletter, The Real Deal! Get industry and INFRA news straight from the sources each and every quarter.

Click here to subscribe to The Real Deal!


#Marketing
#Featured
#INFRANews
#IndustryNews
#INFRABlog
0 comments
823 views